How to Calibrate the Light Sensor


There are two ways to calibrate the light sensor: using the method built in to the NXT programming software.

To use the method built into the NXT software, connect your NXT to your PC (with the NXT cable or Bluetooth), then select the Tools -> Calibrate Sensors menu item, choose Light Sensor, and choose the correct sensor port (port 3 is used by these line following programs) and press the Calibrate button.  At this point the software will download a program called "Calibrate" to the NXT and run it.  Place your robot over the surface to be used and use the screen prompts to sample the two values. 


The Calibrate program will prompt you to sample two light readings for a light sensor on port 3, one for "Black" and one for "White".   Note that "White" just means the lightest part of the surface being run on.  If your surface is tan colored, for example, just sample that for "White" (and similar for "Black").  The program then follows up with a test of light readings that continuously reports the calibrated brightness seen, so that you can easily see and verify the results of your calibration (after calibration, "Black" should report very close to 0 and "White" very close to 100). 


Taking the Two Calibration Readings


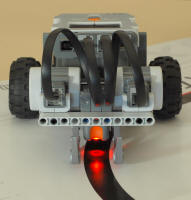
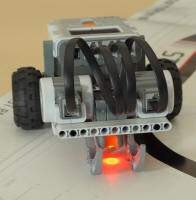
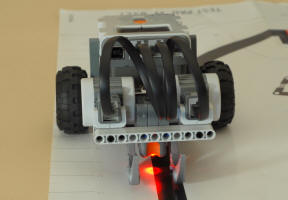
When prompted to sample the "Min" or "Black" reading, position the sensor so that the red spot is centered over the line and then press the Enter button on the NXT. When prompted to sample the "Max" or "White" reading, position the sensor so that the red spot is completely over the surface away from the line and press the Enter button on the NXT. When line following, the robot will try to align itself centered over the boundary between white and black (not centered over the black line), with black to the robot's left.  Here the brightness seen by the sensor is halfway between the black/min and white/max readings.


Courtesy of Lego Education